
Jollen 的 Android 教學,#7: 如何讓文字並排顯示 - TableLayout
.作者:jollen/
.日期:January 8, 2009 4:51 PM
android.widget.TableLayout 是一個「排版」的類別,假設現在我們想要做出如圖1的文字排版效果,那麼使用 TableLayout 就是標準的做法。傳統寫程式排版的做法不是非常的方便,所以我們將採用 XML layout 方式來實作。
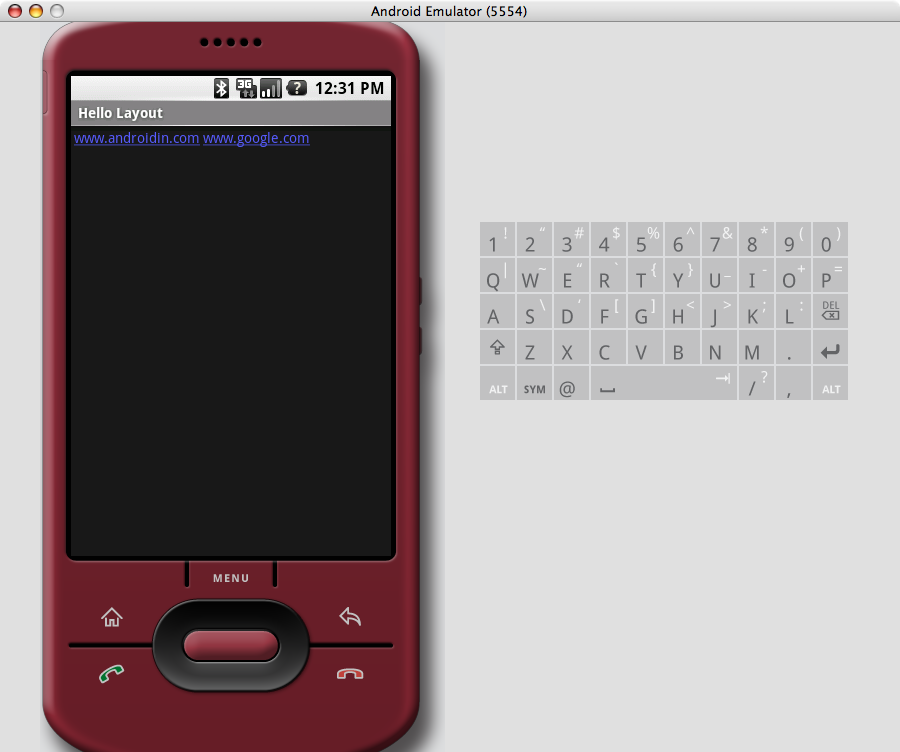
圖1: 文字並排顯示
建立新專案: HelloLayout建立新的專案「HelloLayout」,並撰寫程式碼如下:
package com.moko.layout;

import com.moko.layout.R;

import android.app.Activity;
import android.os.Bundle;

public class HelloLayout extends Activity {
    /** Called when the activity is first created. */
    @Override
    public void onCreate(Bundle savedInstanceState) {
        super.onCreate(savedInstanceState);
        setContentView(R.layout.main);
    }
}
由於我們採用 XML layout 的做法,所以主程式不需要做什麼修改。本範例的重點應該是在 main.xml 檔案的編寫。
設計 TableLayout: 編寫 main.xml新的 Android 專案創建時,預設是使用 LinearLayout(線性排版)來安排 UI。現在,我們將使用 TableLayout 來取代 LinearLayout,以「表格」方式來安排 UI。TableLayout 讓我們可以將畫面切割成一張表格,如果我們可以設計一個二欄式(2 columns)的表格,就可以做出如圖1的顯示效果了。
以下是 main.xml 的內容:
<?xml version="1.0" encoding="utf-8"?>

<TableLayout xmlns:android="http://schemas.android.com/apk/res/android"
    android:layout_width="fill_parent"
    android:layout_height="fill_parent">

	<TableRow>
		<TextView
		    android:layout_width="fill_parent"
		    android:layout_height="wrap_content"
		    android:text="www.androidin.com"
		    android:padding="3dip"
		    android:autoLink="web" />
		<TextView
		    android:layout_width="fill_parent"
		    android:layout_height="wrap_content"
		    android:text="www.google.com"
		    android:autoLink="web" />
	</TableRow>

</TableLayout>
android.widget.TableRow 是配合 TableRow 使用的一個類別,當我們在 TableLayout 裡安排一個 TableRow 時,在 TableRow「裡頭的所有 View」就會被安排在同一列(row)裡。以本範例來說,在第一列(row)裡有二個 TextView,所以這二行文字顯示時,就會呈現如圖1的效果。
為了避免文字擠在一起,因此我們在 TextView 裡加上了 padding 的屬性,如下:
android:padding="3dip"第一個 TextView 的 padding 為 3dip,表示與旁邊的 View 必須空 3 個「間格」,這樣二個 TextView 才不會擠在一起。
Tags: